从听书项目概览和技术栈入手,记录开发环境、Maven 工程、分类接口、专辑管理及前端环境搭建的学习过程。
本篇要点
认识项目模块与技术栈
准备环境并搭建工程
梳理分类和专辑管理入口
内容回顾 1、JVM
2、JUC
– 自定义线程池 ThreadPoolExecutor,传递7个参数
– 核心线程数规则 : IO密集型 2N +1 ,CPU密集型 N+1
– 为什么不使用Executors工具类创建?而是自定义创建线程池
3、MySQL高级
– 单表
– 多表(关联查询)
今天内容 1、项目概述 总体概述
谷粒随享,阅读类听书项目,类似于喜马拉雅
我们项目运行在微信小程序中
技术栈
SpringBoot:简化Spring应用的初始搭建以及开发过程
SpringBoot+SpringCloudAlibaba(Nacos)+OpenFeign+Gateway
MyBatis-Plus:持久层框架,也依赖mybatis
Redis:内存做缓存
MongoDB : 分布式文件存储的数据库
Rabbitmq:消息中间件;大型分布式项目是标配;分布式事务最终一致性
ThreadPoolExecutor+CompletableFuture :线程池来实现异步操作,提高效率
Knife4J:Api接口文档工具
MinIO(私有化对象存储集群):分布式文件存储
Docker:容器化技术; 生产环境Redis(运维人员);快速搭建环境Docker run
Cannal :阿里开源增量订阅组件,数据增量同步
Seata :阿里开源分布式事务解决方案
2、搭建项目环境 搭建软件环境
项目运行需要使用服务,比如mysql、rabbitmq等等
方式一:使用提供虚拟机 **第一步,**下载我提供ts.7z,解压
**第二步,**使用VMware打开解压虚拟机,进行使用
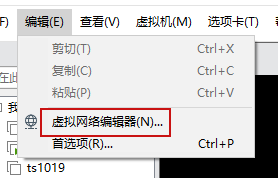
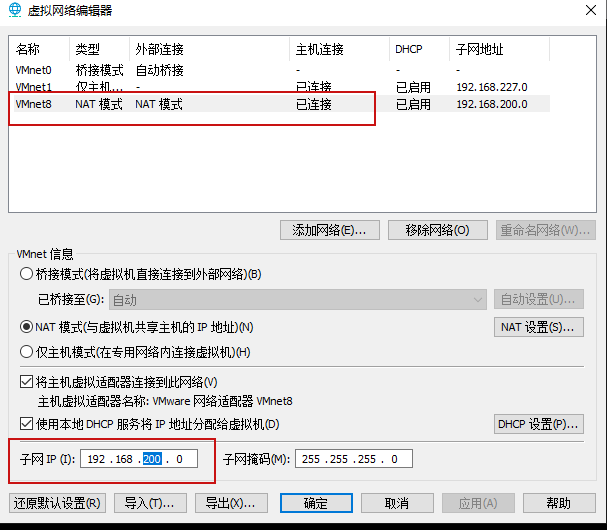
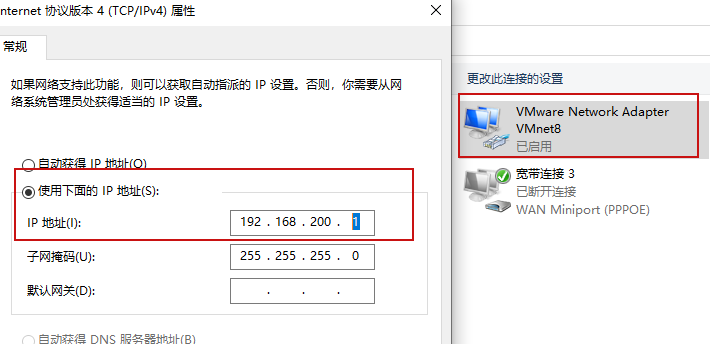
**第三步,**因为我提供虚拟机把ip地址写固定的,设置VMware网络环境
虚拟机ip: 192.168.200.130
用户名和密码 : root / 123456
设置VMware网络环境
设置完成之后,使用连接工具,通过192.168.200.130连接虚拟机环境
虚拟机需要软件
mysql nacos redis minio rabbitmq mongo
es
kibana
logstash
canal
我提供虚拟机里面,rabbitmq需要每次手动启动,docker start spzx_rabbitmq
其他服务自动启动
方式二:自己安装
搭建项目工程
我这里提供工程结构,有基础代码,比如实体类,有controller、service、mapper,有依赖
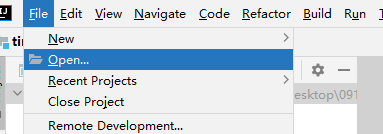
使用idea打开工程
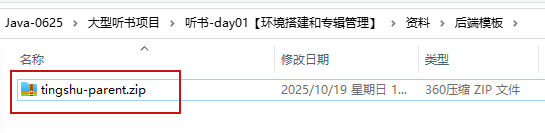
第一步 到资料找到工程模板压缩文件,解压到目录里面
第二步 使用idea打开这个工程
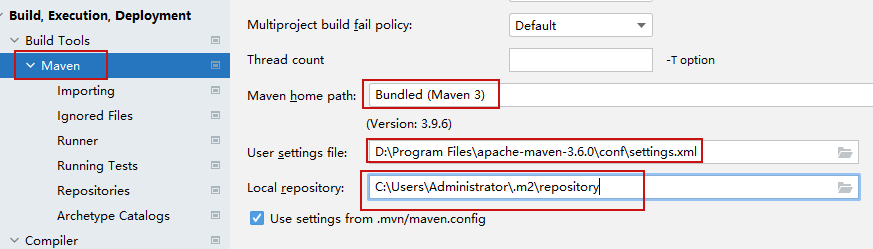
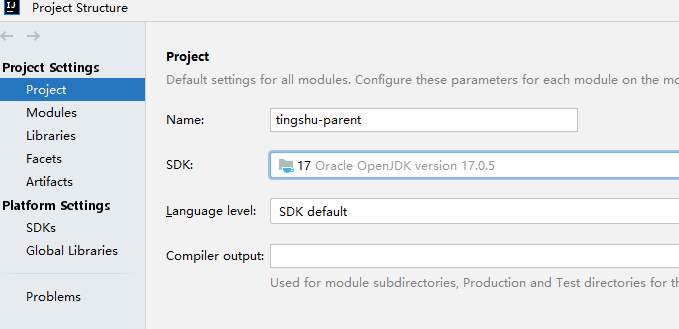
第三步 设置idea的maven环境 和 检查jdk版本
设置好之后,等待依赖下载
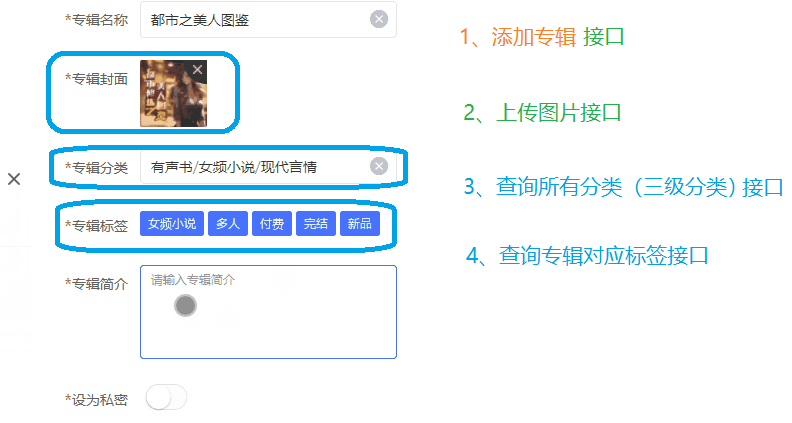
3、专辑管理 添加专辑分析
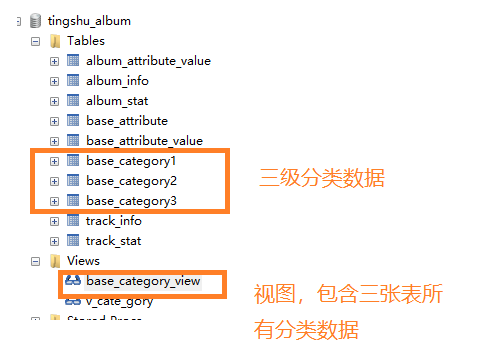
查询所有分类接口(★) 1、因为只是开发后端接口,前端已经开发完成了,后端接口路径和课件保持一致,返回数据和课件一致
2、三级分类返回数据格式:
1
2
3
4
5
6
7
8
9
10
11
12
13
14
15
16
17
18
19
20
21
22
[ { 一级分类id: 1 一级分类名称:音乐 child: [ { 二级分类id:11 二级分类名称:古典音乐 child: [ { 三级分类id:111 三级分类名称:希腊古典音乐 } ] } ] } , { 一级分类id: 2 一级分类名称:军事 } ]
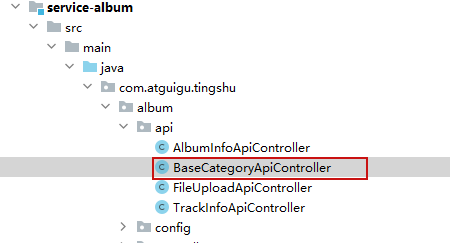
BaseCategoryApiController
1
2
3
4
5
6
7
8
9
10
11
12
13
14
15
16
17
18
19
20
@Tag(name = "分类管理") @RestController @RequestMapping(value="/api/album/category") @SuppressWarnings({"all"}) public class BaseCategoryApiController { @Autowired private BaseCategoryService baseCategoryService; @GetMapping("getBaseCategoryList") public Result getBaseCategoryList () { List<JSONObject> list = baseCategoryService.getBaseCategoryList(); return Result.ok(list); } }
service 1 2 3 4 5 6 7 8 9 10 11 12 13 14 15 16 17 18 19 20 21 22 23 24 25 26 27 28 29 30 31 32 33 34 35 36 37 38 39 40 41 42 43 44 45 46 47 48 49 50 51 52 53 54 55 56 57 58 59 60 61 62 63 64 65 66 67 68 69 70 71 72 73 74 75 76 77 78 79 80 81 82 83 84 85 86 87 88 89 90 91 92 93 94 95 96 97 98 99 100 101 102 103 104 105 106 107 108 109 110 111 112 113 114 package com.atguigu.tingshu.album.service.impl;import com.alibaba.fastjson.JSONObject;import com.atguigu.tingshu.album.mapper.*;import com.atguigu.tingshu.album.service.BaseCategoryService;import com.atguigu.tingshu.model.album.BaseAttribute;import com.atguigu.tingshu.model.album.BaseCategory1;import com.atguigu.tingshu.model.album.BaseCategory2;import com.atguigu.tingshu.model.album.BaseCategoryView;import com.baomidou.mybatisplus.extension.service.impl.ServiceImpl;import org.springframework.beans.factory.annotation.Autowired;import org.springframework.stereotype.Service;import java.util.ArrayList;import java.util.List;import java.util.Map;import java.util.stream.Collectors;@Service @SuppressWarnings({"all"}) public class BaseCategoryServiceImpl extends ServiceImpl <BaseCategory1Mapper, BaseCategory1> implements BaseCategoryService { @Autowired private BaseCategory1Mapper baseCategory1Mapper; @Autowired private BaseCategory2Mapper baseCategory2Mapper; @Autowired private BaseCategory3Mapper baseCategory3Mapper; @Autowired private BaseCategoryViewMapper baseCategoryViewMapper; @Autowired private BaseAttributeMapper baseAttributeMapper; @Override public List<JSONObject> getBaseCategoryList () { List<BaseCategoryView> baseCategoryViewList = baseCategoryViewMapper.selectList(null ); List<JSONObject> finalList = new ArrayList <>(); Map<Long, List<BaseCategoryView>> map = baseCategoryViewList.stream() .collect(Collectors .groupingBy(BaseCategoryView::getCategory1Id)); map.forEach((k, v) -> { Long categoryId1 = k; List<BaseCategoryView> baseCategoryViewList1 = v; JSONObject jsonObject1 = new JSONObject (); jsonObject1.put("categoryId" ,categoryId1); jsonObject1.put("categoryName" ,baseCategoryViewList1.get(0 ).getCategory1Name()); Map<Long, List<BaseCategoryView>> map1 = baseCategoryViewList1.stream() .collect(Collectors .groupingBy(BaseCategoryView::getCategory2Id)); List<JSONObject> categoryChild2 = new ArrayList <>(); map1.forEach((k1,v1)->{ Long categoryId2 = k1; List<BaseCategoryView> baseCategoryViewList2 = v1; JSONObject jsonObject2 = new JSONObject (); jsonObject2.put("categoryId" ,categoryId2); jsonObject2.put("categoryName" , baseCategoryViewList2.get(0 ).getCategory2Name()); List<JSONObject> categoryChild3 = baseCategoryViewList2.stream().map(baseCategoryView -> { JSONObject jsonObject3 = new JSONObject (); jsonObject3.put("categoryId" , baseCategoryView.getCategory3Id()); jsonObject3.put("categoryName" , baseCategoryView.getCategory3Name()); return jsonObject3; }).collect(Collectors.toList()); jsonObject2.put("categoryChild" ,categoryChild3); categoryChild2.add(jsonObject2); }); jsonObject1.put("categoryChild" ,categoryChild2); finalList.add(jsonObject1); }); return finalList; } }
文件上传接口 FileUploadApiController 1 2 3 4 5 6 7 8 9 10 11 12 13 14 15 16 17 18 19 @Tag(name = "上传管理接口") @RestController @RequestMapping("api/album") public class FileUploadApiController { @Autowired private FileUploadService fileUploadService; @Operation(summary = "文件上传") @PostMapping("/fileUpload") public Result fileUpload (MultipartFile file) { String url = fileUploadService.upload(file); return Result.ok(url); } }
service 1 2 3 4 5 6 7 8 9 10 11 12 13 14 15 16 17 18 19 20 21 22 23 24 25 26 27 28 29 30 31 32 33 34 35 36 37 38 39 40 41 42 43 44 45 46 47 48 49 50 51 52 53 54 55 56 57 58 59 60 61 62 63 64 65 66 67 68 69 70 71 72 73 package com.atguigu.tingshu.album.service.impl;import com.atguigu.tingshu.album.config.MinioConstantProperties;import com.atguigu.tingshu.album.service.FileUploadService;import io.minio.BucketExistsArgs;import io.minio.MakeBucketArgs;import io.minio.MinioClient;import io.minio.PutObjectArgs;import io.minio.errors.MinioException;import org.apache.commons.io.FilenameUtils;import org.springframework.beans.factory.annotation.Autowired;import org.springframework.stereotype.Service;import org.springframework.web.multipart.MultipartFile;import java.io.IOException;import java.security.NoSuchAlgorithmException;import java.util.UUID;@Service public class FileUploadServiceImpl implements FileUploadService { @Autowired private MinioConstantProperties minioConstantProperties; @Override public String upload (MultipartFile file) { String url = "" ; try { MinioClient minioClient = MinioClient.builder() .endpoint(minioConstantProperties.getEndpointUrl()) .credentials(minioConstantProperties.getAccessKey(), minioConstantProperties.getSecreKey()) .build(); boolean found = false ; found = minioClient.bucketExists(BucketExistsArgs.builder().bucket(minioConstantProperties.getBucketName()).build()); if (!found) { minioClient.makeBucket(MakeBucketArgs.builder().bucket(minioConstantProperties.getBucketName()).build()); } else { System.out.println("Bucket " + minioConstantProperties.getBucketName() + " already exists." ); } String fileName = UUID.randomUUID().toString().replaceAll("-" , "" ) + "." + FilenameUtils.getExtension(file.getOriginalFilename()); minioClient.putObject( PutObjectArgs.builder() .bucket(minioConstantProperties.getBucketName()) .object(fileName).stream( file.getInputStream(), file.getSize(), -1 ) .contentType(file.getContentType()) .build()); url = minioConstantProperties.getEndpointUrl()+"/" +minioConstantProperties.getBucketName()+"/" +fileName; System.out.println("url:\t" +url); } catch (Exception e) { throw new RuntimeException (e); } return url; } }
4、搭建前端环境
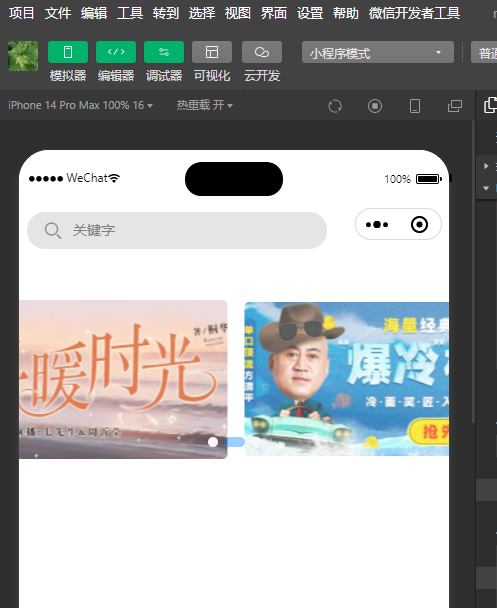
前端代码运行在微信小程序中 测试时候,使用微信开发者工具进行测试
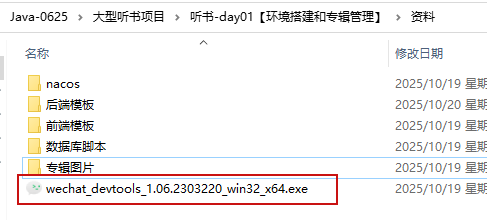
安装微信开发者工具
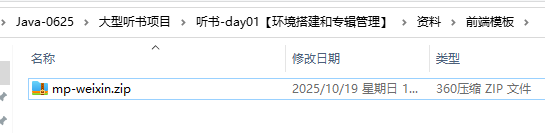
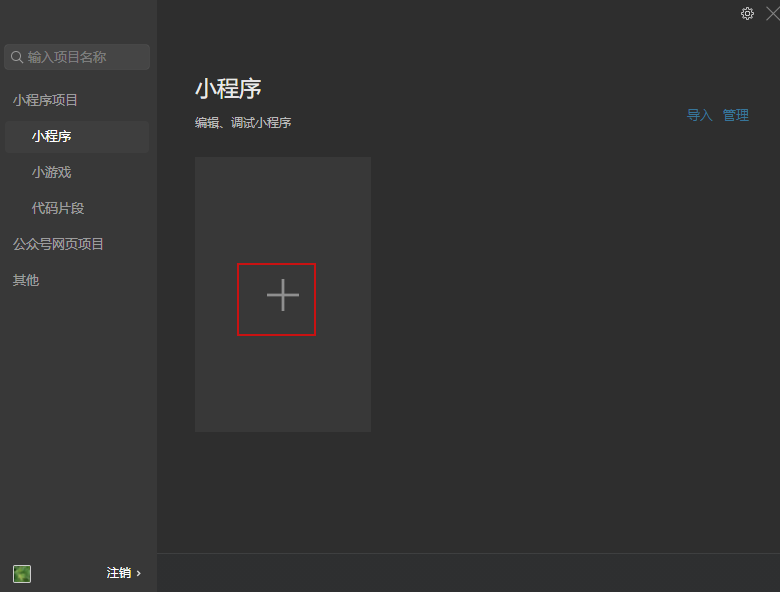
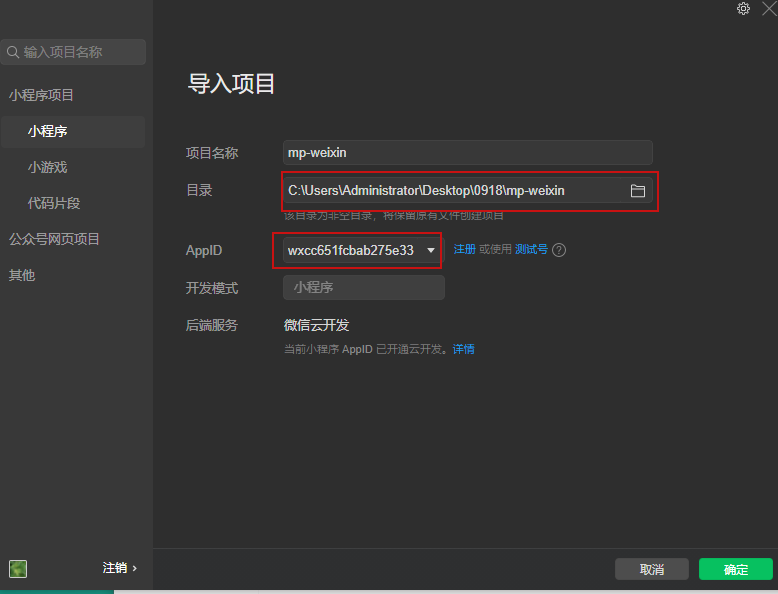
使用微信开发者工具导入前端项目 第一步 资料找到前端代码压缩文件,解压
第二步 打开微信开发者工具
1、注册正式号网站:https://mp.weixin.qq.com/wxopen/waregister?action=step1
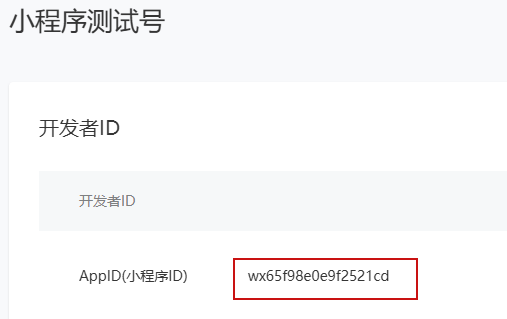
2、注册测试号:https://mp.weixin.qq.com/wxamp/sandbox?doc=1